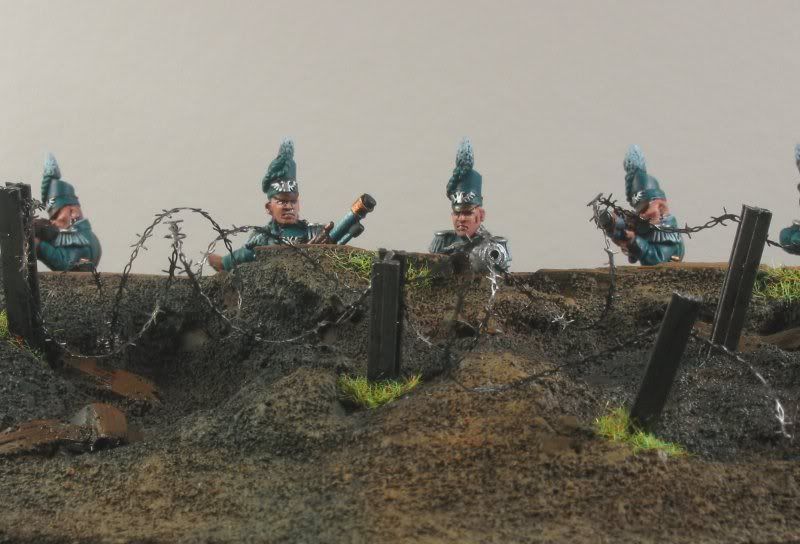
On a grey morning outside the city of Leto, 95th Impoerial Rifles manning a quiet sector of the cities defences, execute the monings Stand To! exercise.

A Kreig Hunting Russ heavy tank destroyer advances through the ruins of Leto on Ultima Thule. Shown here supported by elements of CCCLII Vostroyan first born. Taken from the targeting auspex of the following Hunting Russ.
The Hunting Russ
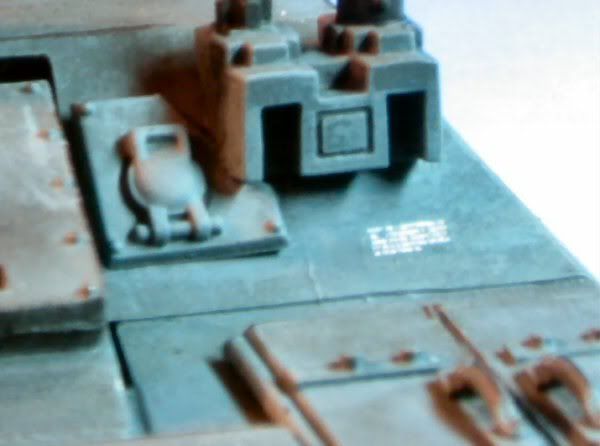
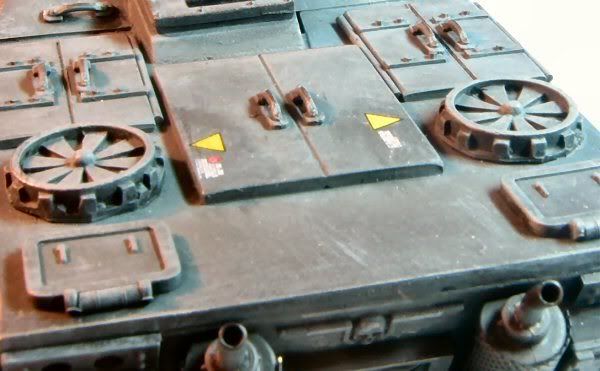
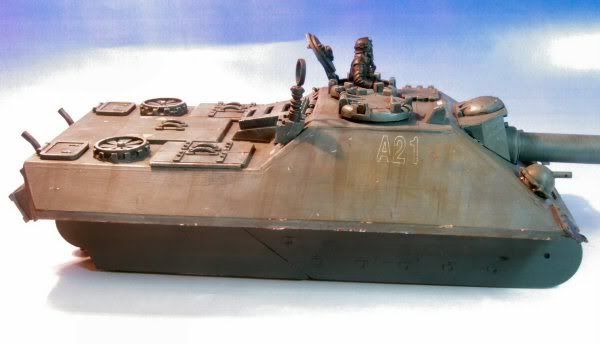
Ultramar in this thread asked for a tutorial on how I weathered my version of Lt Walkes excellent Jagdpanther Destroyer Tank Hunter(Very Pic Heavy). So here it is. Hope it helps
1. Undercoat in citadael black;
2. Base coat of Valejo Black-grey;
3. Scrub that tank with 4:1 VBG:Valejo Wolf Grey;
4.Brush on decal undercoat of Citadael Gloss coat using a CLEAN BRUSH where you want decals;
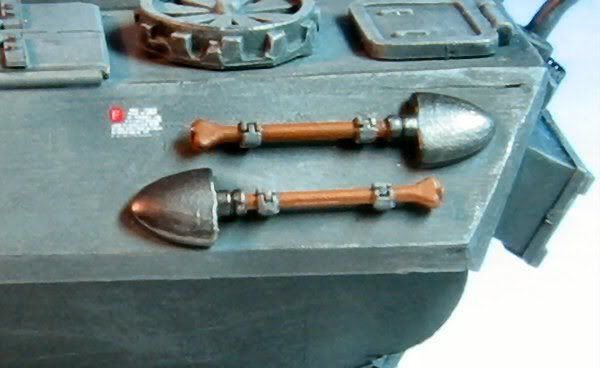
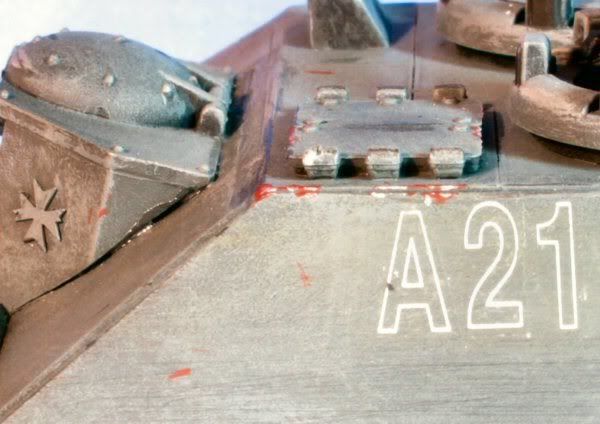
a. Vehicle Number both sides;
b. Radio heat emf warning;
c. Exhaust fan warnings;
d. No step on range finder;
e. Fitting shovel instruction; and
f. Road Plates;
5. to loosen water slide decals, put on tissue folded up and soaked with water. Wait for the decal to become wetted out. while waiting to wet out: apply micro set decal softener to the target area;
6. Use clean brush and tweezers to move decal to model;
7. Soak away excess water/Setting solution with a cotton bud applied near but not on the decal.
OR
Add another layer of microset decal solution then Dab it off with a corner of dry tissue paper;
8. Paint decals with Microflat varnish to remove gloss sheen
OR
Light spray with Purity seal, couple of dry passes;
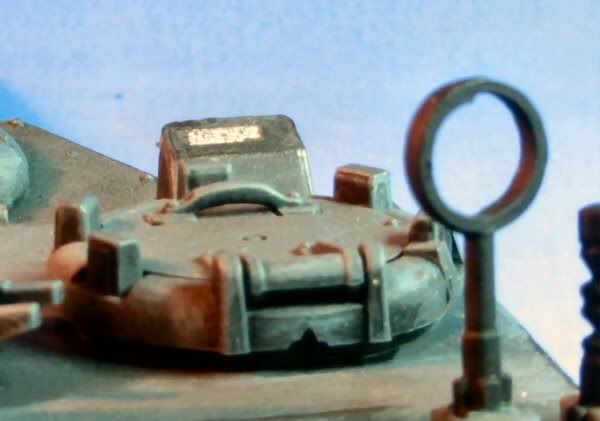
9. Metalise edges with 4B graphite stick (pencil)
10. Apply wear points on hull with a red earth type colour then GW Bolt gun Metal (BGM) using the tropical Islands technique: remember Less is more!;
11.Apply scratches in random patterns using a light grey;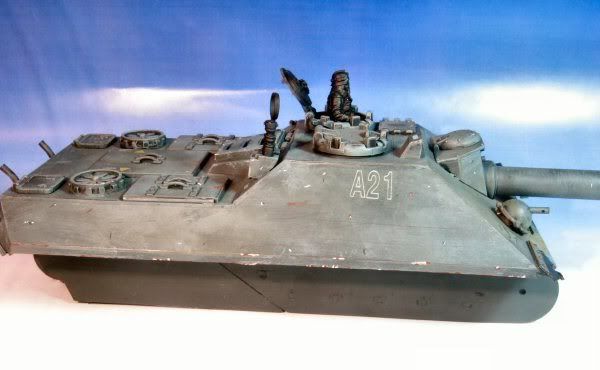
13.Use browns thinned 9:1 with water for the first filters. always apply filters in a downward stroke fashion. Note: this is not a wash but something thinner, try not to let it pool in detail;
14. Apply 9:1 Water:Citadael Chaos Black (CCB) using thin strokes in a downward fashion for water streaking;
15. Rust up using Light red Artists Oil colour streaked using white spirit;
16. Use Mig pigments to add Dust to the horizontal surfaces.
a. Brick dust and European earth for dust collected on roofs;
b. Black for soot from smoke generators and barrel fouling;
17. Humbrol black thinned with turps for fuel and oil stains.
Notes:
Script Decals are cut down liturgy decals from the Witch hunter decal sheet


Having finally decided on a black uniform, I have begun production. I have for various reasons got too many infantry, and not enough Grenadiers. Still I have to paint up the first batches of models before getting any more. Well that's what I keep telling myself anyway. Currently working to this recipe:
Guiding Principle
Block it in and work down to the smaller DetailsPalate
Base Colours
- Chaos Black
- Scorched Brown
- Boltgun Metal
Accents and Highlights
- Space Wolves Grey
- Bleached Bone
- Bestial Brown
- Snakebite Leather
- Blood Red
- Shining Gold
- Mithril Silver
- Badab black
Storm Coat and cloth
1: Basecoat of Scorched Brown 1:1 Chaos Black
2: 1st Highlight of 1:1:1 Scorched Brown:Chaos Black:Bleached Bone
3: 2nd Highlight of 1:1:3 Scorched Brown:Chaos Black:Bleached Bone
4: 3rd Highlight of 1:1:4 Scorched Brown:Chaos Black:Bleached Bone
Leather Boots; Webbing and Gas mask
1: Basecoat of Scorched Brown
2: Bestial Brown Edging and Highlight
3: Snakebite Leather for creases and scratches
Wooden Lasgun furniture
1: Bestial Brown
2: Badab Black wash until it looks right (1-2 Coats)
Metal Armour and tubing
1: Boltgun Metal
2: Badab Black wash until it looks right (4-6 Coats)
3: Scratches using Mithril Silver
Epaulets Piping and Collar Tabs
1: Space Wolves Grey
2: Blood Red
Brass Belt Buckle Helmet Imperial Eagle and Air Hose clamp
1: Shining Gold : Scorched Brown at 2:1
2: Mithril Silver Highlights.
Decals
Left Shoulder gets the Regiment Number
Back Pack gets a Serial Number
Storm troopers get their serial number on their Brest plate on the Right hand side
Well they are here at last. GW/Forgeworld have finally released the Death Korps models. Never mind the squeaky clean America-Mom-And-Apple Pie image of the Cadians; don't give a thought to the Rambo-esque square jawed over muscled semi-mutant Catachans; forget the muffled hordes of Valhallans; I first saw them in the Armageddon website and fell immediately in love. I later saw the full body sketch in the third ed C:IG and was even more in love. The death Korps look like what war is. a Hard, gritty,dirty, bloody business. Having waited so long for these MoFo's to come out I am desperate to make a good job of them, I have held off painting partly to see what the rest of the community comes up with; partly to do research; partly to clear the back log of projects off my desk (which I have Failed to do) and partly because of real life intruding. I have now however brought a couple of figures up to near finished and would like to present here for comment and criticism (please be gentle, but firm). But before the pictures I'd like to give a brief insight into my thinking for the colour scheme.
Base requirements were as follows:
- No requirement for speed painting , I planned to lavish time on each Korpsman
- A more realistic approach with dun-colouring
- German Army C20 based colours in keeping with the theme of the model
- Heavily weathered with a Western Front / Trench styling
At first I thought of going a for a Wermacht WWII field grey - which is actually a green/grey. but then Union-Js thread hit WIP with his catachan green models and that idea was a bit scuppered. I tested a few with that scheme but It was difficult to differentiate the model from Union J's work and still look good (Still the best on the web that I've seen BTW). So I went back to the books and looked further back in history to the Kaiserheer. Here i found a field grey uniform with Green piping and trim of the Jaeger battalions, which is what I have adapted for here. Jaegers were light infantry specialists, the rough equivalent of the British army's Royal Green jackets. In WWII many of these formations were raised as Motorised infantry/Panzer Grenadiers. Which is he theme I'd like to take with these models.
Anyway enough of my ravings:
Test Model 1:Front

Test Model 1: Left Front

Test Model 1 : Right Rear

PS. That's supposed to be a puddle hes standing in, but GW water effects still has a visible meniscus as this scale. I may not use it again for this reason.
Bols Alliance

The Parade Ground


