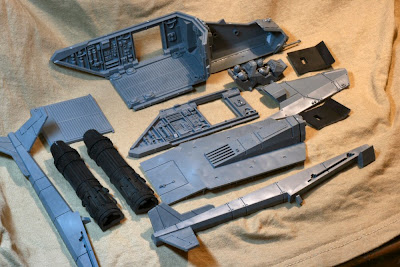
Planning for Painting
I fore-see painting these models taking a long time and being done in many stages, so I think some forward planning might be in order to keep me on track. I have laid out my plan here below for my own reference and I will probably have to up date it as practicalities rear their ugly heads. At the bottom of this post is a list of links to tutorial videos I found on painting using an airbrush. I will be following these quite closely. It is the colour scheme I had in mind anyway (A miss spent youth poring over books on the luftwaffe has obviously left me hopelessly corrupt) so thart was a bonus when I came across the guides.
Assembly:
Assemble the major components:
Undercoat Coat:
Spray Can of Citadael Skull white.
The Cargo bay:
Basecoat VMA: Dark Yellow. Spray all of the inerior and the Inside surface of the doors and the rear cargo hatch.
Mix black VGC:Black and C:Scortched brown (1:2) . Use a sponge to dab the mix lightly to the areas of crew contact. More on the floor less on the walls.
Pick out the buttons in white then paint a layer of green or blue or red on the buttons.
Pick out other details like the stanchions in metalics
Thin AOC: Burnt umber and wash it into the detail on the walls and floor. This adds depth to the detail as well as adding a patina of age to the interior. Once this is dry, add some MIG: European Dust weathering powder to the mix and wash it around the floor.
The Light fittings are oversprayed with thinned VMA: Yellow on the area surrounding the light fittings. This should be very subtle.
The Exterior:
Preshading and base colour
Spray all of the panel ines with Vallajo Model Air Black (Tutorial Part 4b: Painting Techniques: BF109 Preshading).
Apply the Basic hull colours by filling in the middle of each panel towards the outer edge. Then a broad overspray of the same base colour to make the preshading a bit more subtle.:
Side Elevation: VMA: Light Grey
Upper surface: [VMA: Dark Grey]:[VMA: Light Grey] at 3:1
Mottling
For the mottling Use the upper surfcae colour above, but thin to 1:1 pigment to thinners
Squadron Markings Colours:
I masked the Tail aelerons and boom rings and sprayed them VMA:white. Give the white some time to dry and spray the white sections VMA: Yellow.
Tidy Up
Landing Skids - Black and Graphite
The Decals:
Apply the Decals to the last layer of paint! Not after its been Varnished! you muppet (Thats me, not you)!
Engine Cowling:
I am going to go for a heat blasted rust. Start with a base coat of C:Snake Bite Leather. On the rear ring, Paint in C:Chainmail. Add alternate layers of CW: Asuriman Blue and CW: Ball Red across the whole engine cowl. When it starts looking right, wash with thined AOC: Burnt umber and AOC: Black.
Exterior Weathering:
Thin AOC: Burnt umber and wash it into the details. This adds depth to the detail.
Spray VMA: Dark Yellow onto the areas heat damaged by the engine exaust and Laz cannon mounts. The Dark Yellow is thinned with Model Air thinners 2:1 instead of the usual 3:1.
Spray VMA: Black onto the center of the areas heat damaged by the engine exaust. The Black is thinned with Model Air thinners 2:1 instead of the usual 3:1.
The Cockpit Interior
Using this tutorial link as as a guide
Base Coat: Black Grey
Panel Lines/ Stains thinned Black /Brown Mix sprayed
Further Panel line definition by Oil wash of Black/brown
Detailing: Lead pencil to highlight the edges of crew contact areas with a metailic tinge
Orange plastic control surfaces
The Crew:
The crew will be wearing a tan uniform (VMC: Khaki) and green armour plates (VMC: Luftwaffe cam green) with with a white helmet.
For all Vallejo Model Air thin all paints 3 drops colour: 1 Drop Thinner Unless otherwise specified.
Tutorial Index
From Testors Scale Workshop
Full list of Testors Tutorials
Part 1: Introduction
Part 2: Introduction: Tools
Part 3: Introduction: Aribrush
Part 4a: Introduction: Painting
Part 4b: Painting Techniques: BF109 Preshading
Apply a Body Colour to top and sides
Apply an Upper surface Colour
Apply the lower surface Colour
Part 5: Painting Techniques: BF109 Masking
Part 6: Painting Techniques: BF109 Masking Techniques and Mottling
Part 7: Decal Tools and Techniques
Part 8: Compare to Real Thing
Part 9: Panel Line Washes
Interiors: Part 1
Interiors: Part 2
Post Shading: Part 1
Post Shading: Part 2
Chipping and exaust stains
Applying a Flat Coat to a scale model
Applying Future to Clear plastic Parts
Final Report
Building a Flying Stand
Key
VMA: Vallejo Model Air
VMC: Vallejo Model Colour
VGC: Vallejo Game Colour
C: Citadael
AOC: Windsor Newton Artists Oil Colour
CW: Citadel Wash
This entry was posted
on Wednesday, December 30, 2009
at Wednesday, December 30, 2009
and is filed under
Valkyrie,
Work bench
. You can follow any responses to this entry through the
comments feed
.


