I'm gonna make me a me a Valdor Heavy tank. I've never played one on the board so I don't know whether they are effective or not. However , my regular opponent has started to field a Cobra, so I am looking for a cheap heavy tank to counter it. I've had the kit kicking around for a while, so perhaps its time to build it a s a counter to the Cobra.
As with the post on the Banewolf Squadron, I'm going to look for some context for the model in order to try and give some direction to the build and add some flavour to the model. I do this by asking three questions: What is a Valdor; Why Does the Regiment have one?; When is this Valdor depicted.
So...
What is a Valdor
 What do we know about the Valdor Tank: The Valdor is an Imperial Guard tank weighing in at 96 Ton 11.6 meter long variant of the Malcador tank. It has a crew of 5, with a Commander; Driver; an Enginseer and 2 gunners. Its size makes it a Heavy Tank in the Imperial guard. It is believed to have been developed in the years immediately afHter Horus Heresy, at time known as the Scouring of the Imperium. There are references in ancient texts to the Valdor being used to counter the Enemies superior numbers of Land Raiders.
Its main gun is a Neutron Laser. This horrific weapon breaks down the material it touches at the molecular level, releasing a massive Elector Magnetic shock as a consequence.
Very few forge worlds now have the level of sophistication to construct the Valdor in any numbers, or even maintain so they are more often seen in the hands of Adeptus Mechanicus forces.
There are three listed forge worlds still producing these tanks:
- Lathe-Het
- Cyraxus II; and
- Mars.
There is no record of these world producing different patterns but given their vastly separated location it seems entirely feasable these machines designs may have shifted over the millennia of separation.
Only a precious few ever make it into the hands of Imperial Guard regiments, and even then they are usually very Venerable and honoured regiments or they hail from worlds with close ties to the Adeptus Mechanicus.
Why? and When
Why, why would the 291st Panzer Grenadiers have one? While the regiment may have picked up a wreck from its time as a foot regiment on Vraks, however the campaign on that world is nearly 200 years after the period the 291st is depicted in. 'Now' for the regiment is the Praxedes VI Campaign 747.M41, where the regiment participated in the Imperial attempt to resist Tau annexation of the world. The war ground to a bloody stalemate as neither side was willing to commit the strategic assets to bring the campaign to it conclusion. Two years into the war the Eldar intervened after Necron artefacts were discovered. Eldar had no qualms about deploying strategic reserves to destroy the the ancient foe and anything that stood in their way. Scorpion superheavy tanks were soon roaming the shattered trench works of the Tau and Imperial forces.
This Valdor was readied from the divisional stores and deployed on loan to the 291st Death Korps. The regiment was singled out for the honour after destroying the first of Scorpion with meltas and demolition charges in a sustained close assault, waves of Eldar were thrown at the wreck site in a vain effort to recover ruined hulk. The 291st repulsed all of the attempts and eventually handed over the hulk of the tank to a grateful Adeptus Mechanicus. The Valdor was was re-consecrated to the machine-god in the Desert colours of Praxedes VI in order to combat the Eldar Super heavy tank.
Whilst it has only just been moved out of deep storage, fresh from showers of sacred unguents, the Tank has not been left untouched by the planet. Praxedes VI has a sulphur rich crust. Dust from this world quickly invades any cracks or scratches in the in the protective coatings of a vehicle and begins insidious corrosion of the metal underneath.
This vehicle is a fine example of the rapid surface corrosion that occurs anywhere that the dust can get at bare metal.
The honour of receiving the tank granted the regiment limited rights to place their own recognition decals on the doctrinally approved sections of it holy hull.
Overall painting plan and method
Undercoat: Halfords Grey Primer
Basecoat: Citadael Chaos Black
Top coat: Vallejo Air:
Mapping: Vallejo Air:
Camo Pattern: Vallejo Air:
Decals
Matt Varnish
Chipping:
Filters: Burnt Umber; Black
Spot Filters:
General Rusting
Fuel and oil staining
Detailing
And now the confession: I really Really should have written this first. I haven't, Ive gone straight in and jumped from 'Top coat' to 'Filters' I have just reallised this as I have looked back at the Banewolf Squadron, log and seen what order i did that in.

I'm hoping I can still recover this tank and I haven't just wrecked it like I did the first Desert coloured Vendetta. in that case, i rushed and sprayed the matt varnish before applying the decals. Decals don't stick to spray on matt varnish. I hope they stick to Windsor Newton oil washes.
I was crusing through the Warp and came across the Banewolf done for the 14th Grand Company, a Chaos Traitor website. This is an outstanding treatment of the tank, blood red with a good use of weathering, not too heavy, not too light. What really caught my eye was the green bubble filled glass like tube. I was wondering how to do the chem nozzels on my Banewolves. Leaving metalic just seemed a bit boring. This is most definately one answer.
At the moment the Banewolves are stored elsewhere so, this is more of an aide memior until I can get me, some paint and the Squadron in the asme place at the same time.
Cudos to the folks over at 14th Grand Comany for a lovely BaneWolf!
I kinda sorta finished painting the Ragnarok a while ago. I just never got around to Photographing the thing. Mostly because I never got around to painting the stowage. I painted it using the method described in the Forgeworld Masterclass book for the Artillery peice.
Anyhow, on friday I arrived too late for the game, so camera in hand I shot photos left right and center (But not stowage) of the Ragnarok. So here it is, surrounded by Vostroyans from the CCCLII Firstborne:


 1.0: Camo Base
Codex Grey and Battle grey in stripes
(At this point I chould have done some colour variation mapping)
2.0: Campaign Marking Banners
Mask off the front left panel then Spray a white stripe White with Scab red pinstripe.
(I should have do new the chipping method with hairspray and sand grit.)
3.0: Decals
Red small eagles onto the bannersVehicle numbers; Ammo Storage; Krieg labels
4.0: Chipping using a sponge.
4.1 For the Battle grey stripes, Sponge on codex grey chips across the stripes concentrating on the areas where the crew comes into contact with the hull.
4.2 Then the darker, older chips are sponged on with a mix of 2:1 Scorched brown:Chaos Black.
4.3 Using a brush, join some of the chips
together to make a larger chip. Use Fortress grey to put a thin line below the larger chips to highlight them. Helps create the illusion of peeling or worn paint.
5: Seal with matt spray
(At this point I should have done some selective Filteres with Acrylics to create rain streaks.
6: Rivet filters
6.1 Using Black Oil paints, tin it down with white spirit to a wash. touch a wet brush to the rivet
head and let the surface tension carry it around the rivet. Don't over do it.
6.2 wait for it to dry.
7.0: Hull Rust
Flick Mars Red or Rust Red oild paints onto the hull from an old dry brush. Spray on White spirit to soften and difuse the rust.
8.0: The Tracks
I was going for well used dusty tracks.
8.1 Paint the Tracks a mid-brown colour
8.2 Grind some Graphite and rub it onto the tracks to highlight with metalic.
8.3 Edge highlight with mithril silver
8.4 Go over the Rubber road pads with Vallejo German Panzer grey.
8.5 Dust on 'European dust' and 'Industrial dirt' and fix it by driping on white spirit.
8.6 When it dries dust off the excess.
9.0: Charing on the battle damage
Light airgun spray Chaos black on areas of battle damage
10:0 Stowage
I hate doing stowage. Its one of the last things I do before weathering and I hate it
10: Pipes
Principally a weathering task. Paint with oil paints in a patchy manner with different reds. Dust on weathering powder and fix with white spirit, touched on and allowed to spread.
11: Stubber and Melta
11.2 grind some Graphite and rub it onto the tracks to highlight with metalic.
11.3 Edge highlight with mithril silver
(I should have done somthing more here. perhaps the brown through black sprays for the carbon scoring
on the muzzel would have been better).
12: Lenses
Painted using layering technique. Starting with Chaos Black; Scab red; Blood red; Sunburst yellow. Then a dot of white in the corner furthest away from the yellow highlight.


Part 2: Super Detailing on the First Tank
Assemble the components
Start by assembling the tank from the  kit. I have left the three gun nozzles unattached so I can change the tank model from a bane wolf to a hell hound etc.
Leave the turret base plate unfitted. This will make the adding the lifting hooks on the turret much easier.
Leave the pipe run, the back door and the vats out as well.
Physical scratches and chips
Once the hull and turret are complete, take a scalpel blade and carefully make nicks and scratches and gouges on the hull and turret. I pay special attention to the base of the side plates and the area at the base of the front and back of the tank These are areas that will be bounced off and scuffed by stone, brick re-enforcing trees etc. First the Turret.
Hatches with Hinges and Handles
Drill the turret hatch barrel all the way through with a 0.8mm hole. Fit the hatch into the hatch hole and drill the turret hinges. If it goes well the drill bit will find the hole in the hatch and guide it through to the other side.
Once you've got the hole, cut a length from a paperclip and push it through the hole. Trim to fit. Touch a super glue brush to the sides of the hatch hinge, capillary action will carry the super glue into the hinge.
There would be an inner handle to let the crew pull the hatch shut. I fitted this with a small bit of 0.6mm brass wire, bent as best i could with a pair of pliers.
Turret Casting Number
This Turret is casting run 2-P6. The letters are cut from a games Workshop sprue. I changed up the scalpel blade for a fresh one just for the task. Carefully slice the letter or number off the sprue, trying to take just the number and not any of the surrounding material.
Once all three letters and the dash were cut off, I puddled some plastic cement in my palette and used tweezers to pick up the letter and gently touch the letter to the puddle of cement. Then put them on the turret. I used the butt of the scalpel to push the letter onto the turret. The idea here is to stick the letters on without leaving large glue smears on the turret plastic.
Turret Lifting Hooks
There are three lifting hooks fitted to the turret, two on top at the front and one on the side at the rear. Lengths were cut from a paper clip and bent over a the neck of a GW sculpting tool to give a small radius U shape, with one short leg and one long leg.
With an 0.8mm bit, drill a hole in the turret where the first hook will go. Push the long leg of the hook into the hole. Mark where the short leg lands, and drill the second hole. Superglue the hook in from the underside of the turret. Repeat for the other two hooks.
Pintle Mount ring
The Pintle mount is mounted on sliding rings rather than fixed to the turret hatch ring. This is made from a 1mm sheet of plasti-card cut into a strip 3mm wide, then glued carefully to the step on the turret hatch ring.
The mounting arms are from the GW tank accessories sprue. A slot is cut into the end of the arm to allow it to slot over the pintle mount ring. The Guns themselves are from the Death Korps Grenadiers special weapons kit. These have been pinned to the Pintle arm in an 'at rest' position.
Then on to the Hull
Hatch Handles and crew access handles
I added a paperclip wire staple (a piece of wire bent into a 'C' shape) to the engine maintenance hatches on both sides of the vehicle. I also added a smaller staple to the shoulder of the vehicle just above the hatch. The theory is the crew can stand on the engine hatch handle and hold on to the hand hold on the shoulder and swing themselves up.
Fuel Cap All vehicles need em. I have fitted some after market resin  fuel caps to the rear vat cover on the left hand side. The cap hinge was drilled out on one side and a length of 0.5mm rod bent into an "L" shape and pushed into the hinge as a primitive return spring to close the hatch again if a crew member leaves it open. Extra Amour?
Sand Bags?
Not today
Smoke launchers
A smoke launcher comes from the Imperial Guard vehicle Accessory sprue I cut off the ends of the some of the smoke launcher tubes and drilled out the tubes to simulate smoke rounds that have been fired and not yet replaced by the crew.
The Launcher was then fitted to the tank above the Melta cannon. Three 0.5mm have been drilled into the hull and the into the smoke launcher. Telephone exchange wire was used to show the firing wires for each smoke tubes.
Track Guards
Track guards have been fitted in various states of damage to the tanks. Thin the edges that are exposed using a Dremel and needle files.  Remember these are often not much more than pressed tin mudguards, and as such are definitely way too thick for the scale of the model. Carefully thin spots along the length of the mudguards until they are translucent. You can then push holes through the translucent but to simulate the track guards having been damaged by something heavy coming off the tracks in motion.
I also sometimes take off the rivet heads on the banding and drill out where the rivet heads were. Then carefully cut back the fixing strip where it has come away from the track guard.
Battle Damage
Melta /Gauss damage
None today
Laser Damage
None today
Shell Strikes
This Bane wolf has been in action for several years and taken a few hits from High Tech Tau, solid rounds. These have been simulated thusly:
- Take a Brass rod 1.2mm thick heat the end over the Gas hob.
- Find a spot you would like to damage and dig it in and twirl it around a bit.
- Heat the rod again and scratch some lines away from the point of impact.
- Then get the scalpel and randomly cut away wedges from the 'moosh' that squidged away from the poker. You want a rough edged hole with only a little bit of 'moosh' left.
- I also used a Dremel to add a few more gouges radiating away from the hole.
- Unditching Gear (Shovels, Picks Blocks Tackle Chains, Tow Wire, Lumber)
- Personal Gear
- Spare Tracks
Shrapnel Damage, Embedded Shrapnel.
None today
Next time I do a tank...
Headlights
Vision Block guards
Drill out the base plate in line with the earth mover blade, and fit 6mm magnets to both the blade mountings and the hull.
Part 1: Planning
I'm gonna make me a squadron of three Bane Wolfs. These babies rock! Get them outflanking with Lord Creed, and as a fast vehicle they can move 12" and fire all their weapons! Also, armed will hull mounted Multi meltas, they are fearsome Anti Tank units.
Lets start with the What?
What is a Bane Wolf, what do we know about the Bane wolf? very little directly. There is a lot more written about the Hell hound, so a lot of this discussion will be based on the Hell hound. The Hell hound and by extension the Bane Wolf are infantry support tanks. A weapons platform designed to work in close tandem with infantry during assaults, providing self propelled, armoured heavy weapon support.
The Hell hound is a flame-thrower tank and the Bane Wolf is a chemical/bio weapons tank. Given their specialist nature they are rarely deployed in company formations, but rather spread across infantry units as independent vehicles of squadrons.
There are three known patterns of Hell hound:
Mars Pattern:
Artemia Pattern:
Graia Pattern: And one other, the new unknown pattern:
 This unknown pattern most resembles the Graia pattern in body and turret design it . So I will be basing this discussion on the specifications given for the Graia.
So from the specifications given in Imperial Armor Vol IV, there is a crew of 3: Commander; Driver; and Gunner.
As far as I can see the vehicle has two crew hatches, one on the turret for  the commander; and one at the front of the vehicle for the driver, although this may really only be a vision hatch that can be opened when not in combat; there does not appear to be a third hatch, meaning the gunner must enter and exit the tank from the tank commanders hatch (Sux to be him in a firefight!). There is a possible hatch to the left of the turret. This hatch is however, blocked by the turret almost throughout the traverse, leaving it at best an escape hatch and not an entry point. Why am I banging on about the crew? this will play a big part when it comes to weathering the tank. Paint work on vehicles tends to get most damaged where the crew comes into contact with the vehicle. So knowing where they get in and out is important. Also, knowing the number of crew may affect the volumes of stowage a tank may carry.
Then we have the Why?
Why would the Death Korps use a Bane wolf? It seemed simple to me when I read the description. Its a chemical weapons thrower! What could be more perfect for the Death Korps to use! Given the Krieg preference for infantry assault, coupled with the gas masks they never take off it seemed the perfect weapon for them!
Lastly the When?
291st Death Korps of Krieg arrived on Praxedes IV in the middle of the Imperial year 745.M41. At this time the regiment had 33 Bane Wolfs on the manifest in various states of repair. With three of the functioning vehicles attached to the 17th company of the regiment.
The regiment arrived with many of its vehicles still painted in the city fight livery of the Ixus V campaign. Many remained in this colour scheme, although some vehicles were repainted in a yellow tan colour for the summer campaigns in the sulphur rich environment.
More to follow....
A while ago, when rumours of the Death korps of Krieg first started circulating, I thought I'd get ready for the release by building Krieg's own tank: The Ragnarok.
 The Ragnarok tank was developed by Krieg loyalists during the Civil war. The loyalists needed a cheaply made, easy to mass produce tank capable of replacing the horrendous losses inflicted in the civil war. Anything simpler than a Leman Russ must be very simple indeed!!
When the Death Korps range started to be released it soon became clear that this quintessentially Krieg tank would not be included in the range
I initially planned to build a squadron of three, Constructed from a mix of kits including the Leman Russ and Chimera along with a few sheets of Plasticard. The basic hull is a chimera, lengthened with an extra panel. Photobucket" border="0">
The turret ring on the hull and the base of the turret are a Leman Russ, as is the engine bay. The tracks are double linked and all based on a double wheel set. I bought quite a few Chimera road wheels sets for the Hunting Russ. That tank used only the large Chimera road wheels, which left me a large number of small road wheels left over!
 Photobucket" border="0">
The central span of the hull and the turret itself are entirely plasticard. the back of the turret is modelled on the Russian KV-1 , which IMHO is the inspiration for the Ragnarok in the first place.
 Photobucket" border="0">
All of the rivets on the tank were cut from plasticard rod. All of this is much simpler construction than Ultrawerk's master piece, but I remain quite proud of it none-the-less.
shortly after I finished construction of the prototype shown here was completed, the tread head phase I was in fated away, and the tank languished at the back of my painting table for a very long time with only the black undercoat you see it in above.
Eventually I vandalised it with a rush paint job to get it on the table for a tournament at SELWIG. With the release last year of Games-Workshop's spray gun I got inspired to paint it properly, When I get back to the UK I'll have a go at getting some photo's up.
I'd still like to have a squadron but that might take a lot longer.
Chimera D2 is a Games Workshop Chimera Kit with Detailing and a Forgeworld Turret.
 The Turret is the Autocannon Turret from Forgeworld with some extra detailing:
Bracket for the Pintlemount
 Made from a brass Bracket on a 1/38th scale detailing pack for a Panzer mk 4
Turret Stowage
 Made from brass rod bent to shape and yet more detailing brass to form the wire basket
The Hull had a little extra detailing as well :
Glacis

Road Wheel and Gas Cap

Rear Hatch

So the finished chimera looks like this:
Front

3/4 Right

Right

3/4 Left Rear

Well they are here at last. GW/Forgeworld have finally released the Death Korps models. Never mind the squeaky clean America-Mom-And-ApplePie image of the Cadians; dont give a thought to the Rambo-esque square jawed over muscled semi-mutant Catachans; forget the muffled hordes of Valhallans; I first saw them in the Armageddon website and fell immediatly in love. I later saw the full body sketch in the third ed C:IG and was even more in love. The death Korps look like what war is. a Hard, gritty,dirty, bloody business. Having waited so long for these MoFo's to come out I am desparate to make a good job of them, I have held off painting partly to see what the rest of the community comes up with; partly to do research; partly to clear the back log of projects off my desk (which I have failed to do) and partly because of real life intruding in my busy painting Schedule.
The Hunting Russ
Ultramar in this thread asked for a tutorial on how I weathered my version of Lt Walkes excellent Jagdpanther Destroyer Tank Hunter(Very Pic Heavy). So here it is. Hope it helps
1. Undercoat in citadael black;
2. Base coat of Valejo Black-grey;
3. Scrub that tank with 4:1 VBG:Valejo Wolf Grey;
4.Brush on decal undercoat of Citadael Gloss coat using a CLEAN BRUSH where you want decals;
a. Vehicle Number both sides;
b. Radio heat emf warning;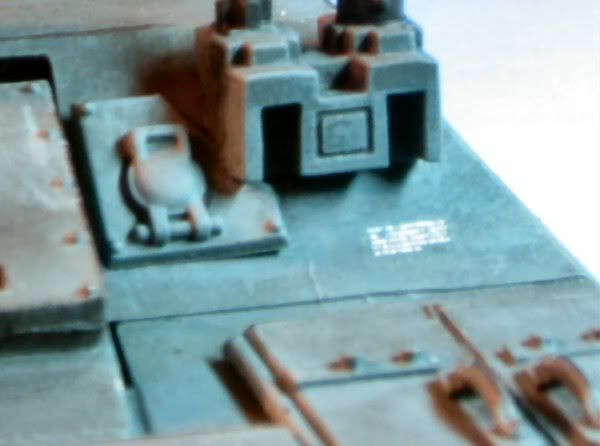
c. Exhaust fan warnings;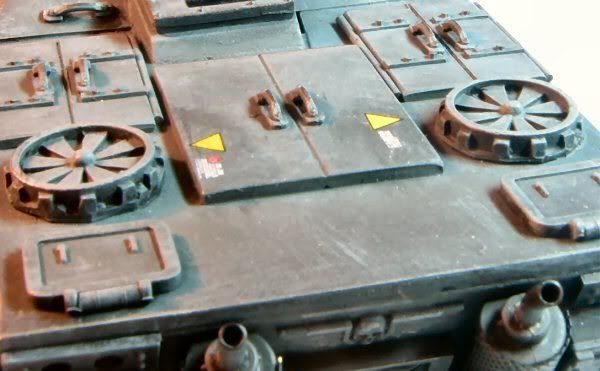
d. No step on range finder;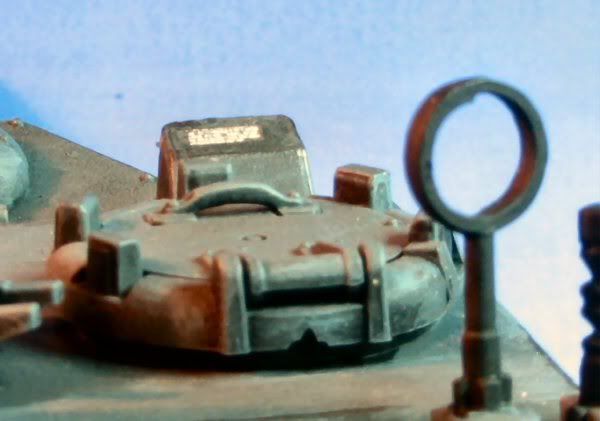
e. Fitting shovel instruction; and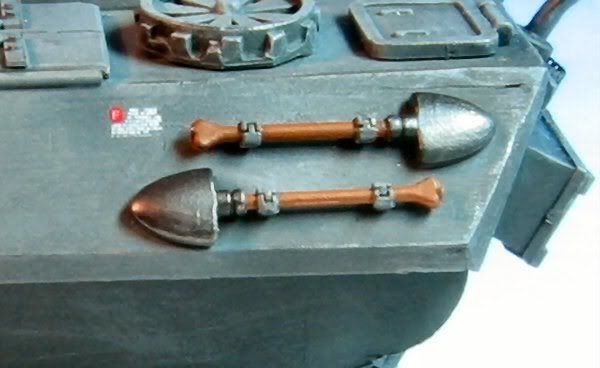
f. Road Plates;
5. to loosen water slide decals, put on tissue folded up and soaked with water. Wait for the decal to become wetted out. while waiting to wet out: apply micro set decal softener to the target area;
6. Use clean brush and tweezers to move decal to model;
7. Soak away excess water/Setting solution with a cotton bud applied near but not on the decal.
OR
Add another layer of microset decal solution then Dab it off with a corner of dry tissue paper;
8. Paint decals with Microflat varnish to remove gloss sheen
OR
Light spray with Purity seal, couple of dry passes;
9. Metalise edges with 4B graphite stick (pencil)
10. Apply wear points on hull with a red earth type colour then GW Bolt gun Metal (BGM) using the tropical Islands technique: remember Less is more!;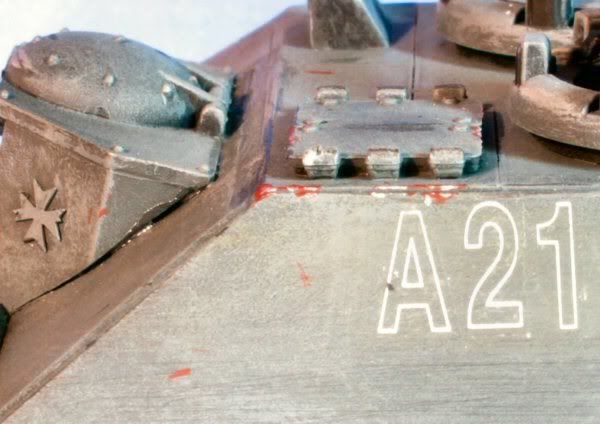
11.Apply scratches in random patterns using a light grey;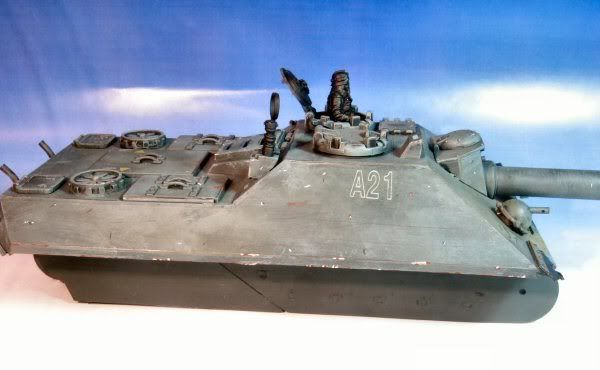 12.Apply wear with more 4B graphite stick, and polish with finger where applicable.
13.Use browns thinned 9:1 with water for the first filters. always apply filters in a downward stroke fashion. Note: this is not a wash but something thinner, try not to let it pool in detail;
14. Apply 9:1 Water:Citadael Chaos Black (CCB) using thin strokes in a downward fashion for water streaking;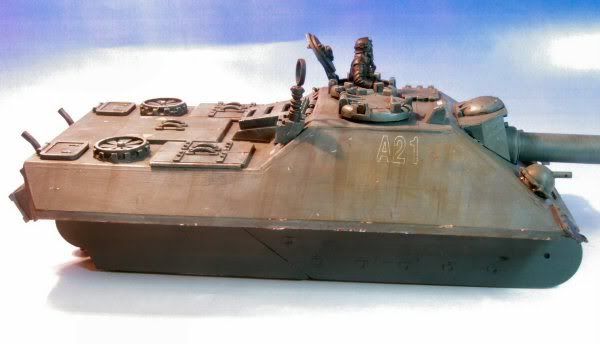
15. Rust up using Light red Artists Oil colour streaked using white spirit;
16. Use Mig pigments to add Dust to the horizontal surfaces.
a. Brick dust and European earth for dust collected on roofs;
b. Black for soot from smoke generators and barrel fouling;
17. Humbrol black thinned with turps for fuel and oil stains.
Notes:
Script Decals are cut down liturgy decals from the Witch hunter decal sheet
Bols Alliance
The Parade Ground


